Repotting Bonsai
Step By Step:
- Sort out your bonsai soil mixture and have a plentiful supply ready. Choosing the right soil mixture is crucial for the health of your trees; it should be well drained to prevent the roots from rotting, while absorbing enough water to supply the tree with water. Some tree species have specific needs and require more specialized soil mixtures, the majority are very happy with this bonsai soil mix.
- Mix akadama ½ with ¼ fine gravel and ¼ potting compost. Read the Bonsai soils section for more detailed information on soil mixtures.
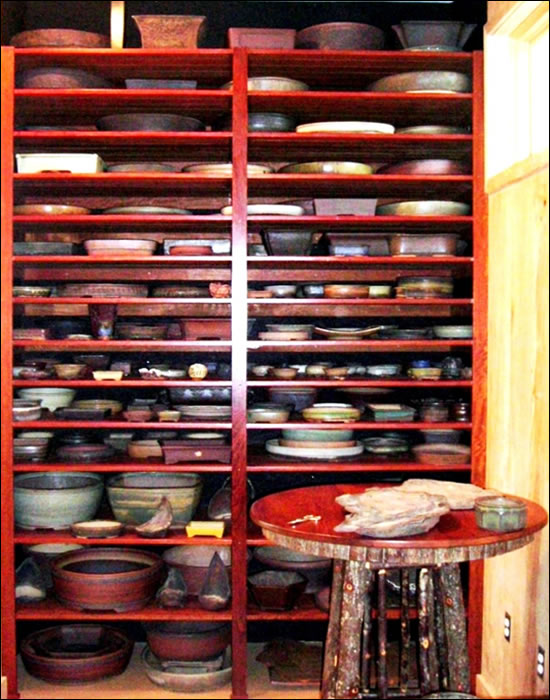
- Choose and prepare the pot, ensure it is clear of debris and unwanted pests, with no cracks likely to break in the coming season. There is a vast choice of colours and sizes to choose from.
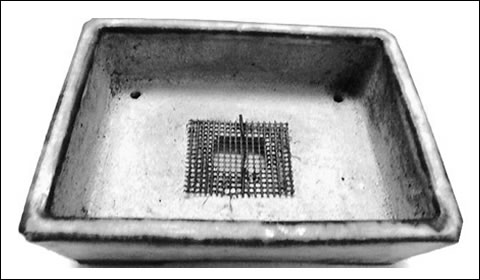
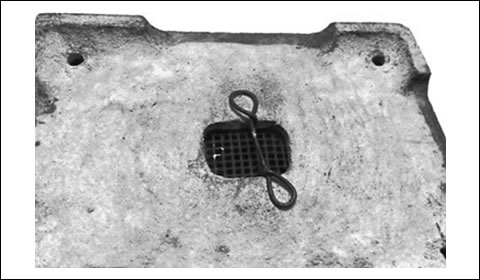
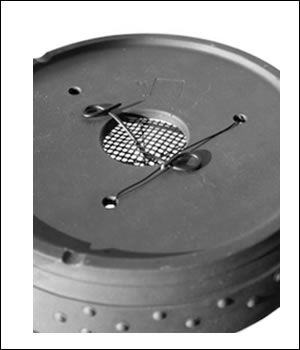
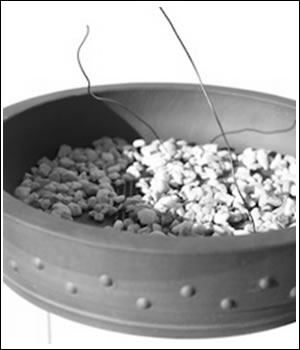
- Place a small square of plastic mesh over the drainage holes, secure it in place with wire twisted underneath to make a bow like shape this will stop the wire falling out and stops the compost from escaping. The smaller holes in the corners can be used to thread wires through and enable you to secure wobbling trees. See Images A below.
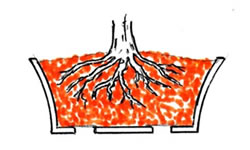
- Cover the bottom of the pot with a thin layer of grit to create a good drainage. See Images B below
- Now use the prepared soil mixture as the second layer, on which the tree will be planted. See Images B below
- Remove the tree from its pot, if necessary use a sharp knife to cut around the edge if it is pot bound and stuck.
- Using a root-hook or sharp pointed object, carefully remove the soil and disentangle the roots. When repotting pine trees never remove all the soil; this would remove the mycorrhizal fungus which is essential for the tree’s survival.
- Cut back long roots; this will help your tree to grow a more compact root-system. Also remove any rotting or vertical growing roots. Prune up to ¼ of the total root mass..
- Place the tree, in position in the pot. Now is the time to change the position especially if you felt the front view should be changed. Usually position slightly to the side of the pot, unless it is a round pot. Secure it in position with wire attaching it through the drainage holes.
- Finish filing the pot using soil mixture to about 1 cm below the rim; make sure the soil fills the pot completely and no air pockets are left between the roots.
- The final step is to water the tree thoroughly.
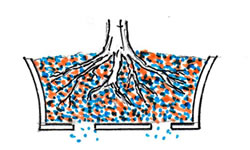
- Using a hosepipe or watering can with a fine nozzle is preferable and allows you to water until the pot is flooded. When using products like akadama or pumice, water should be passed through the soil until it appears clear coming from the drainage holes. See Images C below
- After Care; protect the tree from strong winds and sun for about two months. Start fertilizing one month after the repotting.
Images A
Images B

Images C


Web design: nysys